EA FC 25 Controller settings
Best controller settings in EA FC 25
The controller settings help us adapt the gameplay controls to our preferences and make us even better players. At first glance, however, these settings seem complicated. So there is a chance that instead of making the gameplay easier for ourselves, we get the opposite effect by choosing the wrong options. In this article, we will try to explain all the options and suggest the best choices, based on our assessment.
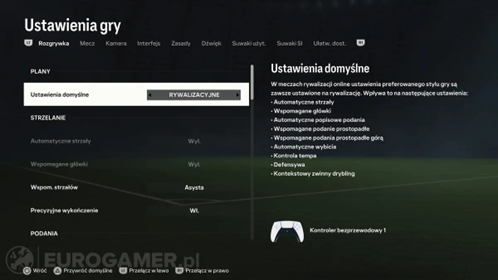
Where to find the controller settings?
- From the main game menu of EA FC 25, select ‘settings’.
- Then go to ‘game settings’.
- You can now adjust the settings according to your preferences.
Controller settings
The green colour indicates the options we recommend, but please note that the choice of options depends on individual preference and may vary from player to player.
Shooting
Auto Shots (deactivated by default in competitive modes)
- On - Players will take auto-shots in appropriate situations.
- Off - Players will never take automatic shots.
Assisted Headers (deactivated by default in competitive modes)
- On - Headers will be partially assisted by the computer, so after a header the ball will be driven towards the goal.
- Off - Headers will be entirely manual and their strength and accuracy will depend on which direction you swing the controller analog when shooting.
Shot Assistance
- Assisted - The direction of the shot will be assisted so that it always aims at the goal.
- Manual - The aiming direction is the direction in which the shot will go.
- Semi - You have to aim in the direction of the goal to make the shots accurate. This is a partial assist shot.
Timed Finishing
- On - Pressing the shot button twice while attempting to hit the goal will trigger a precision finish. The precision and timing of the second button press will determine the outcome of the contact - a perfectly timed strike increases the accuracy and power of the shot, while a poor timing increases the likelihood of missing the target. For the shot bonus to be greatest, the shot button should be pressed a second time when the player's leg is as close to touching the ball as possible.
- Off - Pressing the shot button twice will not affect the quality of the shot.
Passing
Auto Flair Pass (deactivated by default in competitive modes)
- On - Players will make flair passes automatically in appropriate situations.
- Off - Players will not make a flair pass until the button responsible for fancy passes is pressed.
Through Pass Assistance
- Assisted - The direction and strength of the pass will be assisted to help with making passes to the receiver and avoiding opponents.
- Semi - The direction of the through pass will be less assisted. It will still depend on the direction taken by the player, but its strength will still be partially assisted.
- Manual - The direction and strength of the pass is completely determined by the player.
Lobbed Through Pass
- Assisted - The direction and strength of the pass will be assisted to help with making passes to the receiver and avoid opponents.
- Semi - The direction of the lobbed through pass will be less assisted. It will still depend on the direction taken by the player, but its strength will still be partially assisted.
- Manual - The direction and strength of the pass is completely determined by the player.
Ground Pass Assistance
- Assisted - The direction and strength of the pass will be aided to help with making passes to the receiver and evade opponents.
- Semi - The direction of the pass on th will be less assisted. The power of the pass will be assisted while the AI will only help a little with the direction of the pass.
- Manual - The direction and strength of the pass is completely determined by the player.
Cross Assistance
- Assisted - Direction of cross will be assisted towards a teammate. The power of the cross will be assisted to the front or back post and there will be no power bar on the cross.
- Semi - You have to choose the right power, but the direction of the cross will be assisted in the areas at the nearer and further post.
- Manual - The direction you point is the direction of the cross, and the longer you hold down the button to perform the cross, the stronger it will be.
Lob Pass Assistance
- Assisted - The direction and strength of the lob pass will be assisted, so lob passes will be played towards a teammate.
- Manual - The direction you point will be the direction of the lob pass, and the longer you hold down the lob pass button, the stronger the pass will be.
Pass Receiver Lock
- Late - The recipient of the pass is selected as late as possible, only when the ball is kicked.
- Animation Start - The recipient of the pass is selected early, as early as the start of the kick animation.
- Power Up - This option is the fastest possible selection of the pass recipient. It is selected when the pass button is released or when the power bar is full.
Precision Pass Sensitivity
- Normal - Less responsive, but more precise.
- High - The direction of the pass will always match the direction in which you point the left analog. This will make the passes more accurate, but also more difficult to aim.
Defending
Auto Clearances (deactivated by default in competitive modes)
- On - Players will perform clearances automatically in appropriate situations.
- Off - Players will never make a clearance unless the clearance button is pressed.
Clearance Assistance
- Classic - The direction and force of the clearance will be fully adjusted and the direction indicated by the player will not be taken into account.
- Directional - the direction of the clearance will be adjusted by the player, but the force will be fully adjusted and the game will choose the first possible direction of intervention.
Jockey (Manual by default in competitive modes)
- Manual - During the Jockey movement, there will be no assistance in terms of speed or direction. The player is on his own.
- Assisted - The speed of the Jockey movement will be assisted to help the player stay close to the opponent, but there is no assisted direction of movement.
Defending
- Tactical Defending - When the button responsible for traditional tackle is pressed, the player will perform a traditional tackle or shoulder tackle on the opponent depending on the position.
- Legacy Defending - Allows you to freely select the mode of tackle. With the button responsible for traditional tackle, we can perform a traditional tackle, while with the button responsible for passing, we can perform a shoulder duel with the opponent.
Pass Block Assistance
- On - Footballers will attempt to automatically intercept passes when the ball is near them.
- Off - All passes will be intercepted manually.
Switching
Auto Switching
- Air Balls and Loose Balls - The game will only switch between players on lobs, crosses and when the ball is loose.
- Only Air Balls - The game will only switch between players on lobs and crosses.
- Only Loose Balls - The game will only switch between players on crosses and loose balls.
- Auto - When defending, the game itself will switch players to those best positioned.
- Manual - Switching players will always be manual.
Auto Switching Move Assistance
- None - The player you switch to will not run in the direction before the switch.
- Low - The player you switch to will run in the direction from before the switch for a short time. This will give you time to choose a new direction.
- High - The player you switch to will run in the direction from before the switch for an extended period of time. This will give you time to choose a new direction.
Right Stick Switching
- Classic - Moving the right analog will switch to the nearest player in your chosen direction.
- Player Rotation - Moving the right analog quickly will move the player change indicator, but will not switch control to that player. You must press the player change button to switch to that player.
- Adaptive - Holding down the right analog for longer will switch you to further players as you let go.
Right Stick Switching Reference
- Player Relative - The controlled player will be the reference point of the right analog changes.
- Ball Relative - The ball will provide a reference point for changes to the right analog.
Right Stick Switching Sensitivity
- From 0 to 10 - The higher the sensitivity, the more the game will respect directional pointers when selecting the next player. The lower the sensitivity, the more likely the game will select the player closer to it, even if the direction is not directly pointing at them.
Next Player Switching
- Classic - The game will switch the best-suited player based on various criteria.
- Goal Side - The game will switch to the player on the side of the goal.
- Closest To the Ball - the game will switch to the player closest to the ball.
Player Lock
- On - When enabled, the AI will take control of the player at the ball, allowing you to move another player into a convenient position and ask for a return pass. You can make this play by pressing both the left and right sticks, and then put the player in position by making a movement with the right stick.
- Off - This option will be disabled.
Icon Switching
- On - Press the right stick defensively to activate the switching icons. Tilt the right analog towards the player you want to switch to. This is an advanced method of switching between players and we do not recommend it, especially for beginners.
- Off - This option will be disabled.
Dribbling
Contextual Dribbling (deactivated by default in competitive modes)
- On - Players will automatically perform ‘agile dribbling’ in certain situations, for example in a 1-on-1 clash with an opponent.
- Off - Players will never automatically perform ‘agile dribbling’.
Orbit Dribbling
- On - Dribbling without the ball allows you to make movements around the ball without touching it.
- Off - Orbit Dribbling is disabled.
Goalkeeper
Save Assistance
- Semi - Shoots close to the goalkeeper's body will be automatically saved, and for all other balls, position, direction and timing must be adjusted accordingly.
- Assisted - Shots flying relatively close to the goalkeeper's body will be automatically saved, for all others you have to take care of positioning and timing. The direction does not matter.
- Manual - Only reflex saves are automatic. Any other shoot will depend on your positioning, timing and the direction you are trying to save.
Controller preferences
Analog Sprint
- On - Activating the Analog Sprint allows you to control the speed of the sprint. The harder you press the sprint button, the faster the player will run.
- Off - You won't be able to control sprint speed.
Trigger Resistance
- On - The sprint button will cause slight resistance during some actions.
- Off - The ‘Trigger’ effect will be disabled.
User Vibration Feedback
- Classic - Full controller vibration when key gameplay actions happen.
- Enhanced - Enhanced gameplay experience as vibration activates in different areas of the controller for a true sense of real-world action.
- Off - Disables all controller vibrations
Summary
Good controller settings are an important aspect of improving your game. However, it is important to remember that you have to choose these settings for your own preferences. It's also not something that will make you instantly a world champion in EA FC 25. It's just one of many factors, such as skill, the right tactics or a strong line-up. As for the question of upgrading your squad, remember that it can be helpful to buy FC 25 Coins.